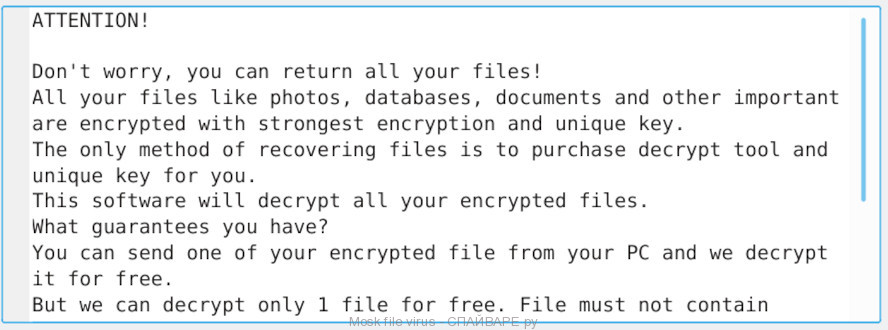
Mosk virus is a new ransomware. It is created to encrypt files on the computer. All files that were encrypted by the ransomware become useless and get the .mosk file extension. These files cannot be used as before. Each directory in which there are encrypted files contains a file with a message from Mosk creators. In this message, the criminals say that the files were encrypted and demand a ransom in exchange for the ability to decrypt the encrypted files.
Mosk ransomware virus is able to encrypt files such as movies, photos, documents, drawings, databases including common as:
.r3d, .pem, .js, .wps, .dba, .wp, .srf, .arch00, .wmv, .cfr, .ibank, .pdd, .7z, .w3x, .hplg, .pef, .lvl, .qic, .das, .x3d, .wbk, .p7b, .sis, .epk, .wpb, .xmind, .slm, .wbmp, .fpk, .bik, .xls, .hvpl, .xll, .wmf, .3dm, .kdc, .rofl, .itdb, .x3f, .zip, .indd, .xml, .bkp, .webp, .itl, .desc, .fsh, .zdc, .apk, .t12, .wbm, .txt, .vpk, .flv, .dazip, .odc, .tor, .zif, .mef, .xlsx, .rw2, .odm, .wbz, .menu, .wsd, .bc7, .ff, .erf, .wpw, .orf, .hkdb, .vfs0, .qdf, .arw, .1, .wmd, .bkf, .xdl, .xlsb, .litemod, .2bp, .rim, .mcmeta, .psd, .wn, .syncdb, .rar, .bay, .sidn, .wm, .icxs, .ntl, .re4, .sie, .gho, .mpqge, .zi, .wpe, .pptx, .wpd, .zw, .bsa, .rwl, .yml, .wcf, .tax, .mlx, .wav, .wot, .big, .dxg, .ybk, .xy3, .png, .xdb, .wri, .wgz, .xmmap, .xld, .psk, .pkpass, .wire, .iwd, .wma, .sb, .wpg, .eps, .ptx, .xlsx, .y, .xls, .lbf, .dmp, .xpm, .wpt, .odb, .0, .xlk, .crw, .kdb, .ztmp, .ltx, .sav, .zabw, .3fr, .hkx, .wsh, .map, .xbplate, .accdb, .pak, .rtf, .xyw, .wotreplay, .sr2, .itm, .dng, .upk, .mdb, .zdb, .wmo, .3ds, .xx, .wp5, .d3dbsp, .ods, .svg, .bc6, .wbd, .jpg, .m2, .wpa, wallet, .odt, .pdf, .jpe, .mov, .bar, .odp, .snx, .py, .t13, .x3f, .pfx, .xlsm, .mdbackup, .xlsm, .ai, .z, .m4a, .sid, .doc, .raf
Attackers clearly inform each victim that he has the ability to recover locked files only paying a $980 ransom. After transferring the specified amount to cyber frauds, the user will receive a private key from them, which will help to decrypt and restore files affected by Mosk virus. If the money for the purchase of a unique tool for decrypting files will be transferred to the fraudsters within 72 hours, they are ready to give the victim a discount of 50%.
Threat Summary
| Name | Mosk |
| Type | Ransomware, File locker, File virus |
| Encrypted files extension | .mosk |
| Ransom note | _readme.txt |
| Contact | salesrestoresoftware@gmail.com, salesrestoresoftware@firemail.cc |
| Ransom amount | $490/$980 in Bitcoins |
| Symptoms | Your files have .mosk extension appended at the end of the file name. Documents, images and music won’t open. Files named like ‘_readme.txt’ in every folder. |
| Distribution ways | Torrent web sites, Drive-by downloads, Phishing emails, Adware |
| Removal | Mosk virus removal |
| Decryption | Mosk decryptor |
Quick links
Mosk virus removal
If you become a victim of Mosk virus, then the best way to remove it from your computer is to use malware removal tools. Below we list the utilities that have the ability to find all components of the ransomware and remove them.
Use Zemana Anti Malware to delete Mosk virus
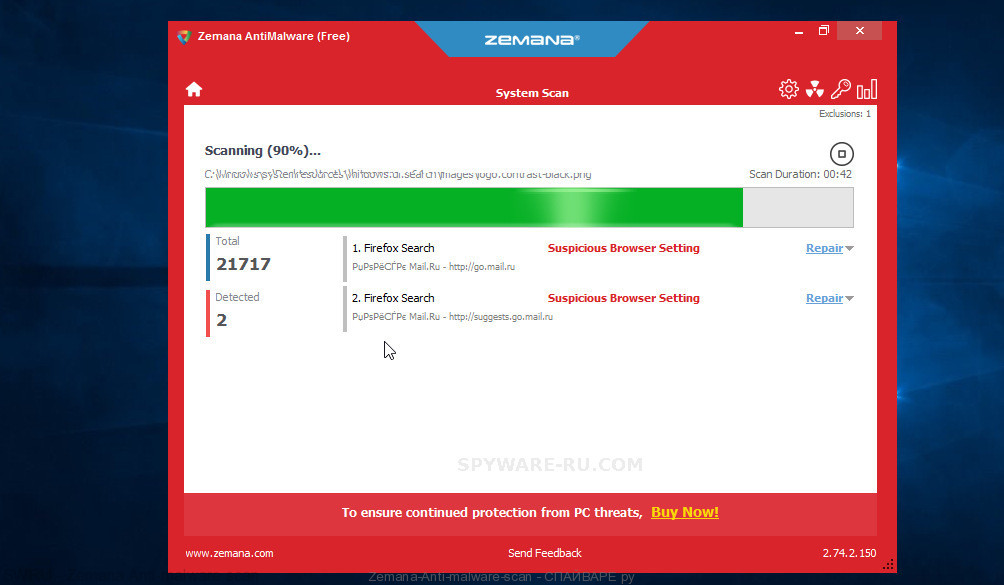
Zemana is a malware removal tool that is used for ransomware, worms, adware, trojans, spyware and other malware removal. It is one of the most efficient anti malware utilities. Zemana helps in ransomware virus removal and and defends all other types of malware. One of the biggest advantages of using Zemana is that is easy to use and is free. Also, it constantly keeps updating its virus/malware signatures DB. Let’s see how to install and check your computer with Zemana in order to remove Mosk virus from your computer.
- Download Zemana setup file called Zemana.AntiMalware.Setup from the following link. Save it on your Desktop.
Zemana Anti Malware download link - Run the installer and then follow the prompts to install Zemana on your personal computer.
- During installation don’t make any changes to default settings.
- When setup is done, it will automatically start and update itself.
- Click the “Scan” button to begin scanning your personal computer for Mosk file virus. Depending on your computer, the scan can take anywhere from a few minutes to close to an hour.
- After Zemana Anti-Malware (ZAM) has completed scanning your computer, you’ll be shown the list of all detected threats on your computer. Make sure all threats have ‘checkmark’ and press “Next” button to remove the found malware.
Run MalwareBytes Anti-Malware to remove Mosk virus
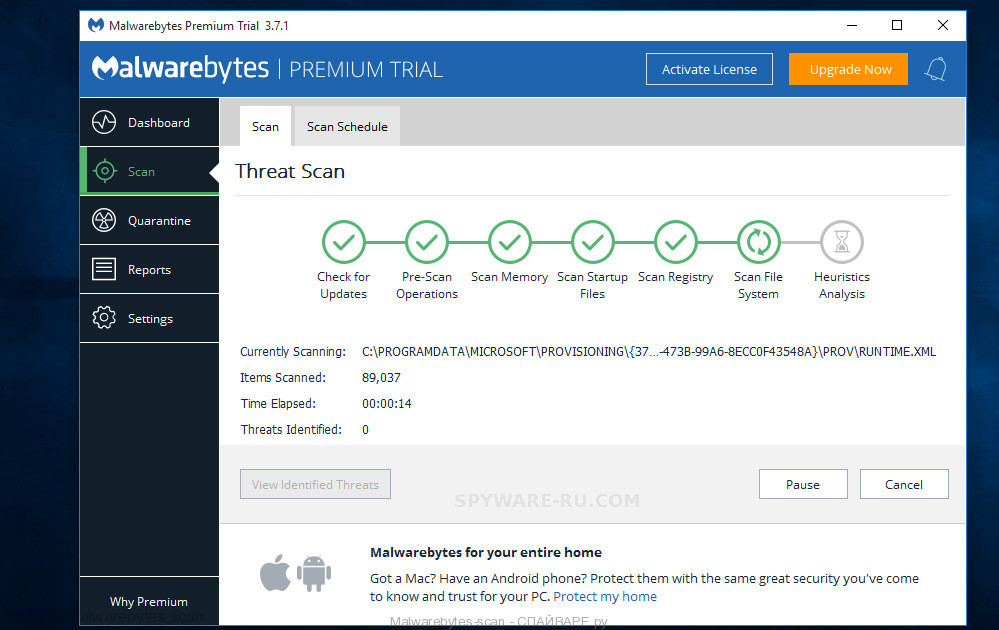
We suggest you to use the MalwareBytes Anti Malware to fully remove Mosk file virus. Moreover, this malware removal tool will help you to remove other malicious software, PUPs, toolbars and adware that your machine can be infected too.
- Please go to the link below to download the latest version of MalwareBytes AntiMalware (MBAM).
Malwarebytes download link - After downloading is done, run the file called mb3-setup.
- It will open the “Setup wizard” which will help you set up MalwareBytes on the PC system. Follow the prompts.
- Once installation is complete successfully, click Finish button. Then MalwareBytes will automatically run and you can see its main window.
- Click the “Scan Now” button to perform a system scan with this utility for Mosk virus related folders,files and registry keys.
- Once the scan get finished, MalwareBytes will open a scan report. When you are ready, click “Quarantine Selected” button.
Remove Mosk virus with Kaspersky virus removal tool
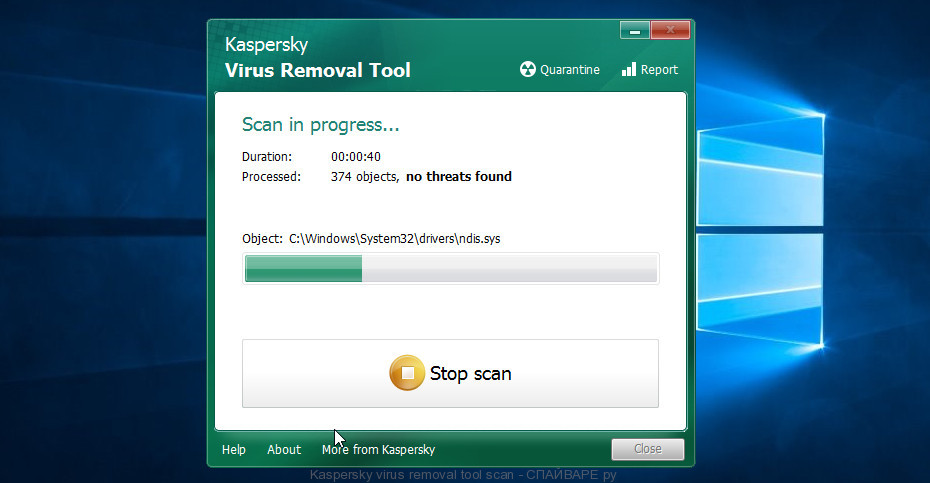
Kaspersky virus removal tool (KVRT) is a free portable program that scans your computer for ransomware and allows delete it easily. Moreover, it will also help you remove other malicious software.
Kaspersky virus removal tool download link
Mosk decryptor
Mosk decryptor is a free tool that is created to decrypt .Mosk files. The full name of this program is ‘Decryptor for stop djvu’, it was created by Emsisoft to decrypt files that were encrypted by malware belonging to the Stop (djvu) ransomware family.
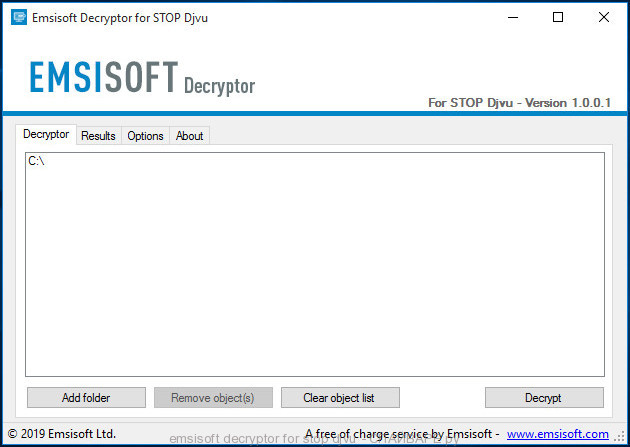
Emsisoft decryptor for stop djvu
How to use Mosk decryptor to decrypt encrypted files
- Visit the page linked below to download Mosk decryptor
STOP Djvu decryptor - Scroll down to ‘New Djvu ransomware’ section.
- Download the ‘decrypt_STOPDjvu.exe’ file to your desktop.
- Run decrypt_STOPDjvu.exe
- Select the directory or drive where the encrypted files are located.
- Click the Decrypt button.
.Mosk file recovery
Unfortunately, free Mosk decryptor is not always able to decrypt files. But even in this case, it is possible to restore the contents of encrypted files. Below in this article we will give several ways, please try all of them. Perhaps one of them will allow you to completely restore the files, or rather, return them to their original state, to the state that was before their encryption.
At this stage, I want to emphasize that before recovering files, you must definitely check your computer for viruses, find and remove malware that encrypted your files. The only way to skip this step is to get the disk with encrypted files and connect it to another computer, then use it to restore your files. Attention, using a disk on another computer, there is a small chance that you accidentally infect that computer with this virus.
Restore .mosk files using ShadowExplorer
To restore documents, photos, databases and other important files, that is, practically “decrypt .mosk files without a key,” we first recommend using a free program called ShadowExplorer. If you have not come across this program, then here is some information about it. It is a small utility that allows you to easily access copies of files that are created automatically by a standard OS function called Windows Previous Versions.
Download the program using the link that you can find below. We recommend that you save the downloaded file to your desktop, so you can easily find it after the download is complete.
When the program download is complete, you will see a file called ShadowExplorer-0.9-portable.zip. The utility is in the archive, so you need to unzip the archive before starting the program. Right-click on this file and select the option called Extract All. Now open folder ShadowExplorerPortable.
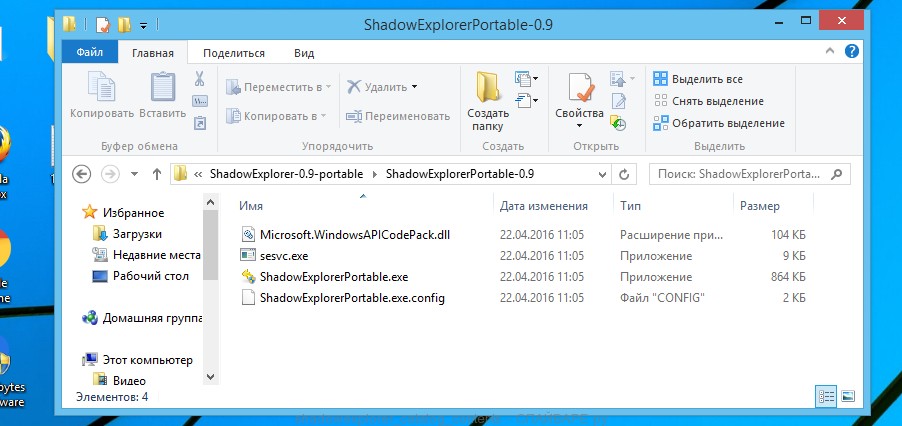
In the list of files, find the ShadowExplorerPortable program and run it.
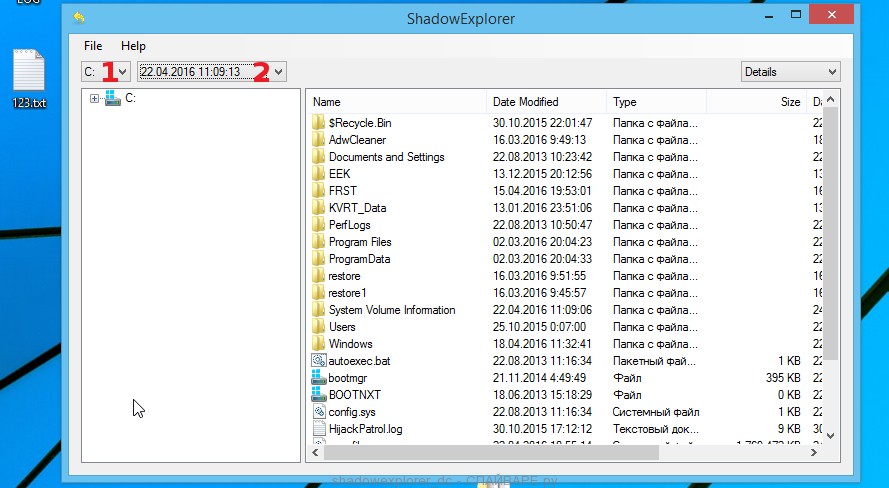
The main program window will open before you, as in the following example. The main window is divided into two parts – left and right. In the left part of the window, select the drive on which the encrypted files are located and select the date closest to the moment when the virus attacks your computer, encrypts the files and has changed the file extension to .mosk. In the right part of the window, select the file you want to restore, then right-click on it.
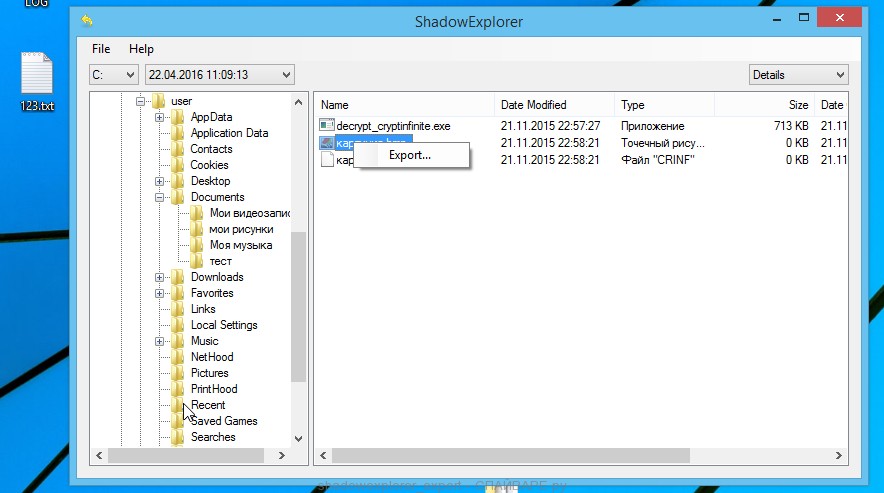
A small pop-up menu will open before you, select Export in it. In the next window, select the directory where the recovered files will be saved.
What else do I want to say about the process of recovering encrypted files using the ShadowExplorer tool. Unfortunately, very often ransomware disable the Windows Previous Versions function and delete all saved copies of files. Therefore, after starting the ShadowExplorer, you may find that it is impossible to recover files. In this case, use another method of recovering encrypted .mosk files, which is given below.
Restore .mosk files using PhotoRec
Another way to recover encrypted .mosk files is the ability to use utilities designed to find and recover accidentally deleted and lost data. We recommend that you use the free PhotoRec tool. It is one of the best and has already helped readers of our site repeatedly recover encrypted files in a seemingly absolutely hopeless situation.
Before using the program, you need to download it. Use the link below.
When the file is downloaded, in the folder where you saved it you will see a file with the name ‘testdisk-7.0.win_.zip’. This file is the archive that contains the PhotoRec. To use the PhotoRec, this archive must be unzipped. Right-click on the file and select the item called Extract All. Open the folder with the name testdisk-7.0, you will see a list of files similar to the one below.
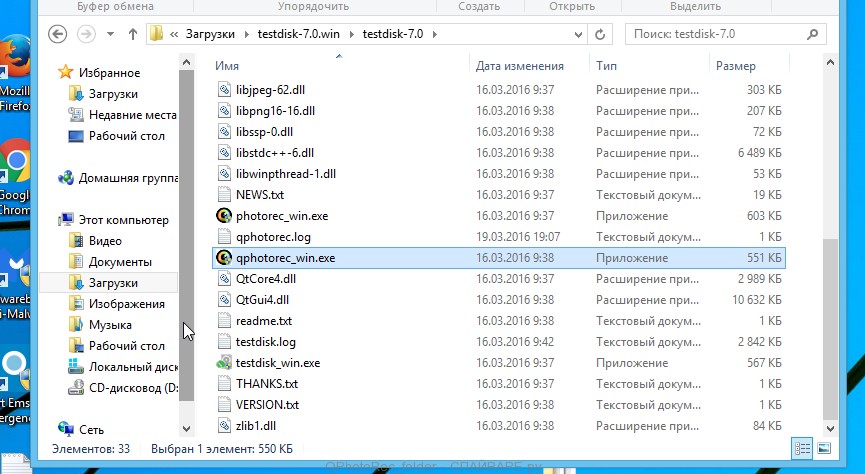
In the contents of the directory that opens, find the file with the name QPhotoRec_Win and run it. You will be shown a window similar to the one in the following figure. This is the main PhotoRec window.
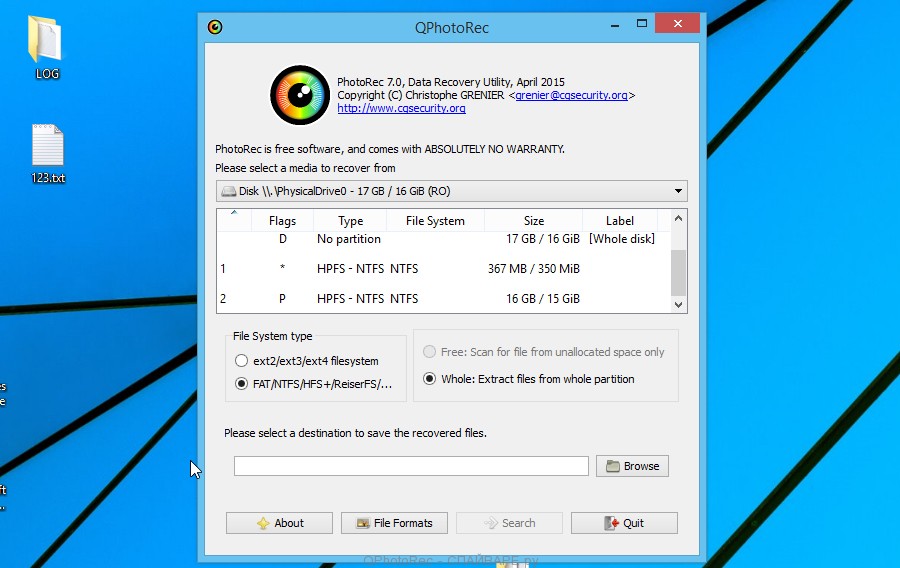
Here you need to select the physical disk and the disk partition (disk name) where the encrypted .mosk files are located. Note that in section ‘File System Type’, option ‘FAT/NTFS’ must be selected. Now select the folder where the recovered files will be written. We recommend using a partition or drive that does not contain encrypted files. It is better to use external media. It is very important! Since the PhotoRec restores files that were deleted by the Windows OS, if you restore them to the same drive on which you are trying to find them, a situation may occur when the Windows simply physically overwrites them and you can no longer recover such files.
Next, at the bottom of the window, click File Formats. A small window opens that lists the types of files that the PhotoRec can find and restore.
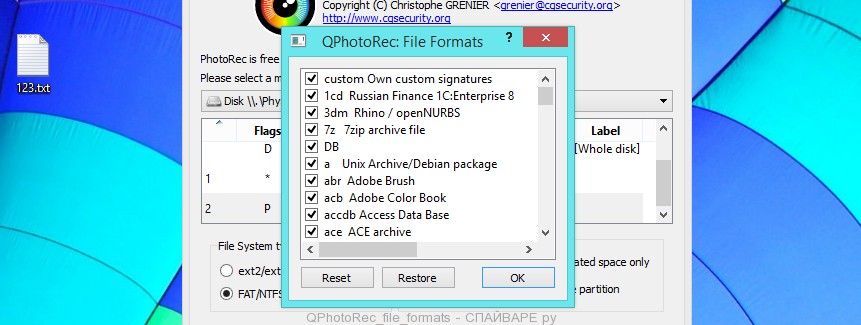
Leave only those file types that you need to recover selected. For example, if you want to restore images of ‘jpg’ format, then select the file type ‘jpg’. Having decided which files to recover, click OK button.
Having completed the steps listed above, you have made all the settings necessary to search and restore encrypted .mosk files. It remains only to click on the Search button. The process of searching and restoring files can take a very long time, be sure not to turn off the computer or restart it. During this process, the program will show the current search location (disk sector), how many and which files were found and restored.
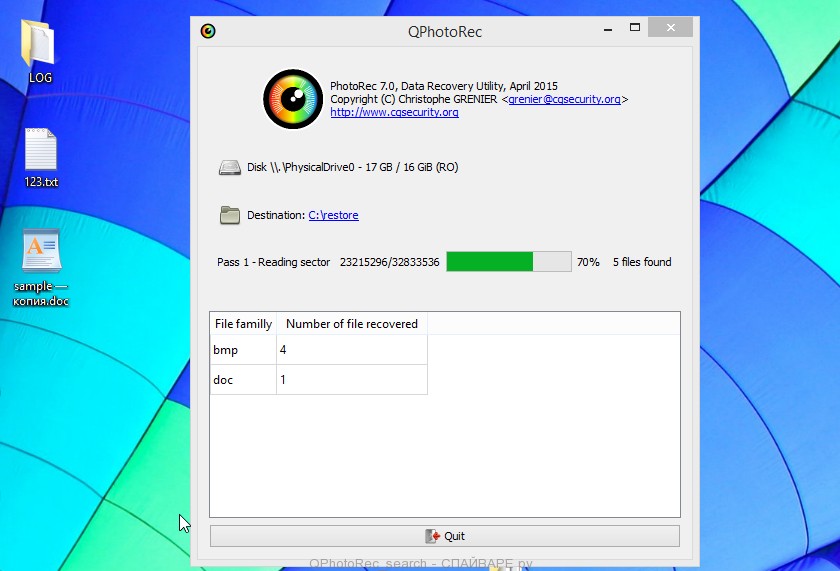
When the file recovery process is complete, click the Quit button. Then open the directory that you previously selected as the place where the recovered files will be written.
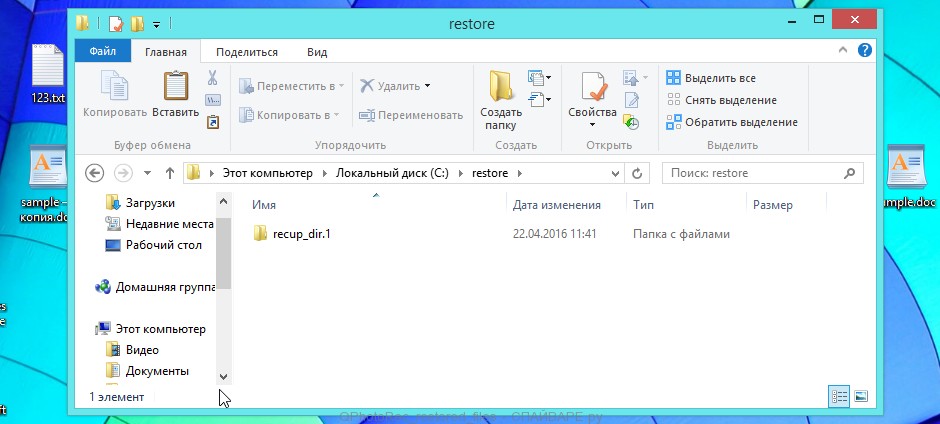
Here you will see one or more directories with the name recup_dir (recup_dir.1, recup_dir.2, …). Check these folder to find the files you need. The file name may not be restored, so to find what you need, use file sorting, as well as the standard Windows OS search by file contents.
I hope this information helped you remove Mosk virus and restore the encrypted files. If you have any questions or you have information that will help readers of this article, then please add your comment below.


